

This post may contain affiliate links. See our affiliate disclaimer here.
 The first thing Alyssa and I did when we moved into our first RV, was rip everything out and do a massive renovation. We loved the idea of turning the RV into our first home (on wheels). The best part was, we did the entire renovation for $500. The RV we bought was $11,500. Ever since, I’ve been slightly obsessed with hearing stories of super cheap RV renovation projects.
Why?
First off, they are really cool to look at. Secondly, it proves that you can own your own home (and make it look awesome) for really cheap.
For today’s blog I asked my friend Patrick to share how he bought and renovated his Sunrader for less than $7,000 (meaning he spent $2,700 to buy it and then $3,000 for the renovation). Because it’s an extremely long post, I decided to break it up into a table of contents (see below).
If you want to skip straight to Patrick’s Sunrader renovation, then click here.
If you want to read Patrick’s whole story (which I totally recommend), then just start below!
Enjoy!
P.S If you have a cool RV renovation project you’ve done and want to share on my blog, shoot me an email! Would love to share.
Table of contents:
- Why I Decided to Move Into a Van
- The Maiden Voyage
- Why I Sold My Van and Bought a Sunrader Instead
- The Sunrader Renovation
Why I Decided to Move Into a Van
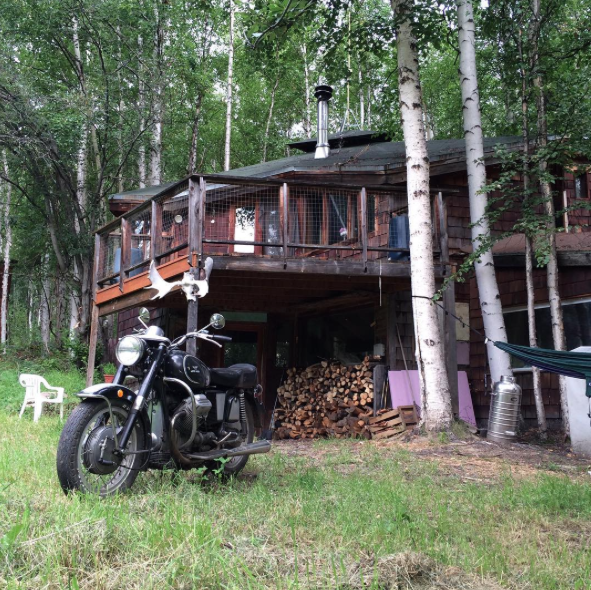
July 15, 2015. That’s the day I moved out of my cabin in Fairbanks, Alaska and into a van. I didn’t move into a van because I was evicted. It was a conscious decision and a goal that was achieved after several months of planning.
In April 2015 I read Tim Ferriss’ book “The 4-Hour Workweek”. Reading Tim’s book and listening to his podcast prompted me to negotiate with my employer the freedom to telecommute. After it was agreed upon that I could work remotely, I set out looking to buy a vehicle in which I could live and travel.
Vehicles in Alaska tend to sell at inflated rates. For nearly two months I searched online for the perfect vehicle. Vans that were 20+ years old and had over 150,000 miles were listed for several thousand dollars, which seemed absurd to me. It got to the point that I began looking in cities such as Seattle because it would be cheaper for me to buy a vehicle there and then drive it back to Fairbanks.
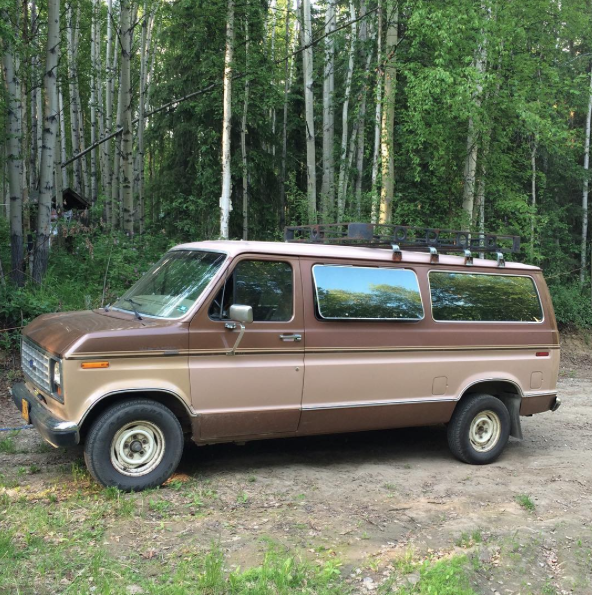
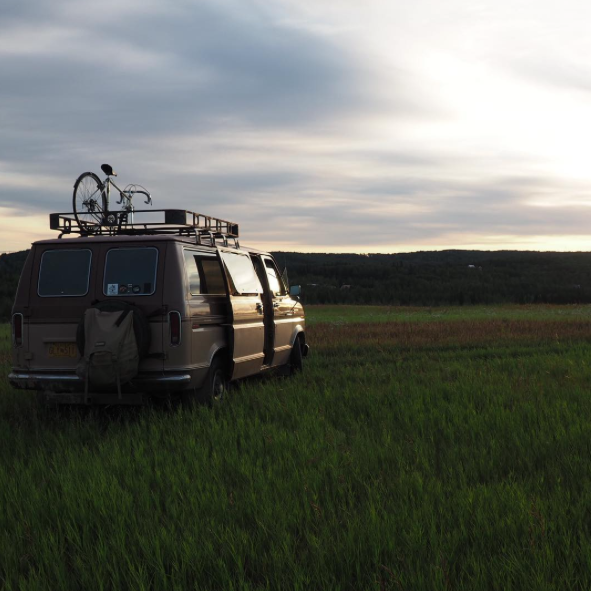
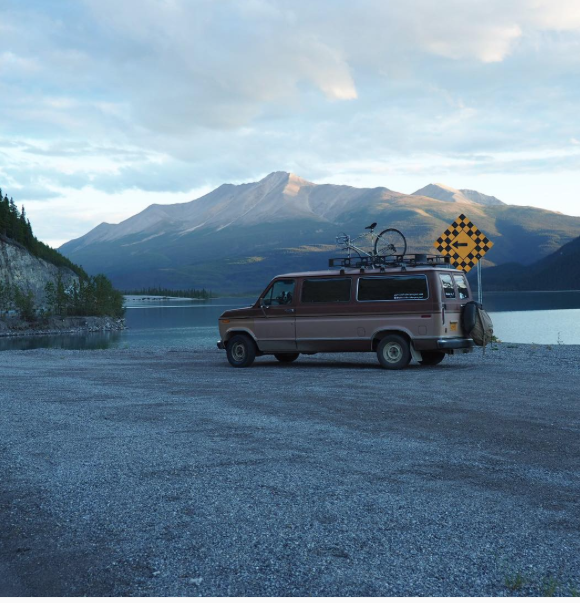
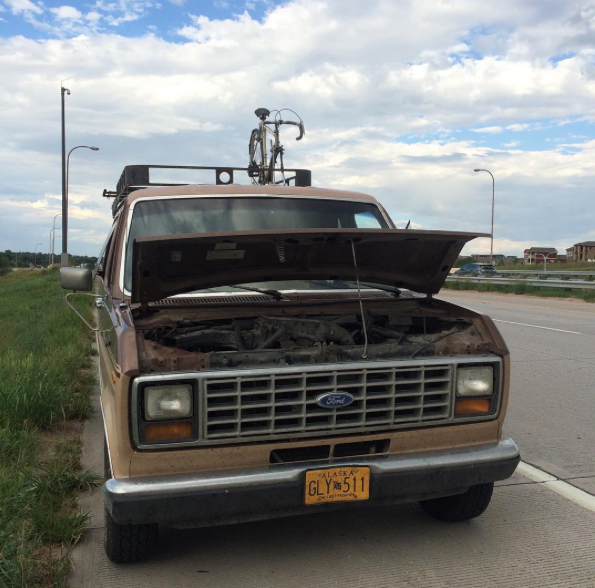
Eventually I settled on a 1989 Ford E150 XLT van. I found the van for sale in Fairbanks on Craigslist for $3,000. I negotiated with the buyer and settled on a price of $1,500. The van came with a set of new snow tires, which I turned around and sold for $500.
I started downsizing after buying the van. I had a large collection of records, books, and art. I also collected several motorcycles and vehicles while living in Alaska. It wouldn’t be economical for me to store these items, and taking them with me certainly wasn’t an option since space in the van was limited.
I had a few reasons for wanting to move out of my cabin:
- I’ve always had a propensity to travel. I worked in the airline industry for nearly eight years before I moved to Alaska and I used the benefit of free airfare to travel a lot. I wanted to go out into the world and explore.
- I try do at least one thing each day that forces me outside of my comfort zone. But since moving to Alaska I found myself becoming more introverted and complacent in regards to stepping outside my comfort zone. I wanted to dismantle my comfort zone and force myself to be more extroverted.
- I amassed a lot of student debt (nearly $70,000). A large portion of my debt was a result of going to a private school for two years. That debt grew by postponing payments by exercising deferment options. I wanted to get creative with my living expenses and aggressively pay down my debt.
In the winter of 2014 I read a book called “Walden on Wheels” by author Ken Ilgunas. I heavily related to Ilgunas. He grew up in the northeast and found himself in debt after graduating college. He then moved to Alaska and worked aggressively to pay down his debt. He paid off his debt in rapid time and then made the decision to go to grad school. To avoid going into debt once again, Ilugans secretly lived in a van on the school’s campus. You could say that Ilgunas’ book was my introduction to van life.
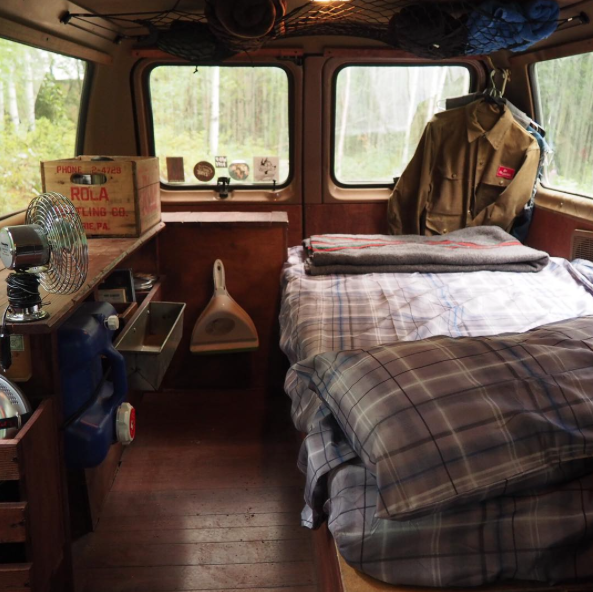
I didn’t have any carpentry experience or proper tools but I started to renovate my van into a mini-camper. I gutted the interior of the van to bare metal, then insulated the walls and floor to began construction. I kept costs down by utilizing reclaimed materials. I completed all renovations for less than $500 and did so using only a speed square, jigsaw, and drill.
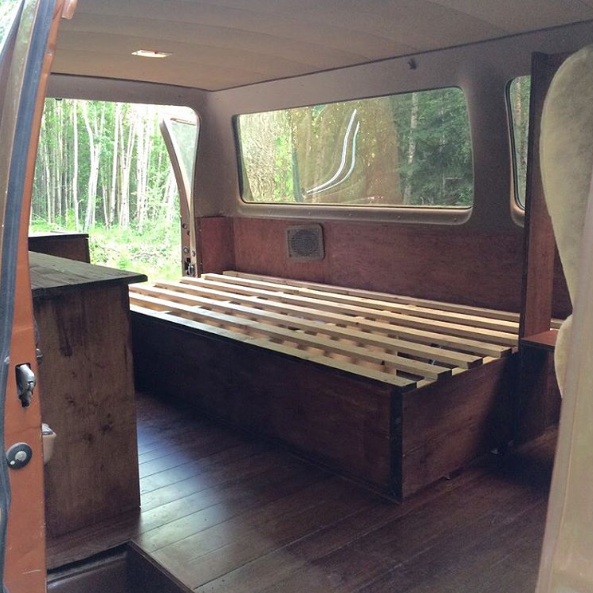
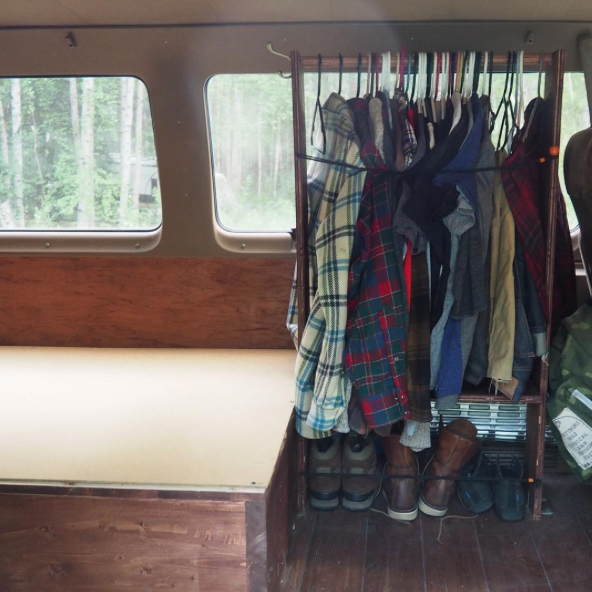
The amenities in my van were extremely limited. There was no bathroom or kitchen. I purchased an alcohol fueled camping stove and used that to prepare my meals. My decision to limit my amenities in the van wasn’t simply due to a lack of space, but in an attempt to push myself outside my comfort zone. I wanted the van to be comfortable but I didn’t want enough comforts of modern living that I would be compelled to spend my free time hiding out inside the van. Again, part of my objective was to be out in the world interacting with people.
The Maiden Voyage
I took my van out for its maiden voyage the week I completed renovations. Friends of mine are in a band called The Scurvies and I drove them from Fairbanks to Anchorage for a show. The van made it to Anchorage and back without incident. However, the transmission in the van went out a week after its maiden voyage. It cost $1,200 to have the transmission rebuilt.
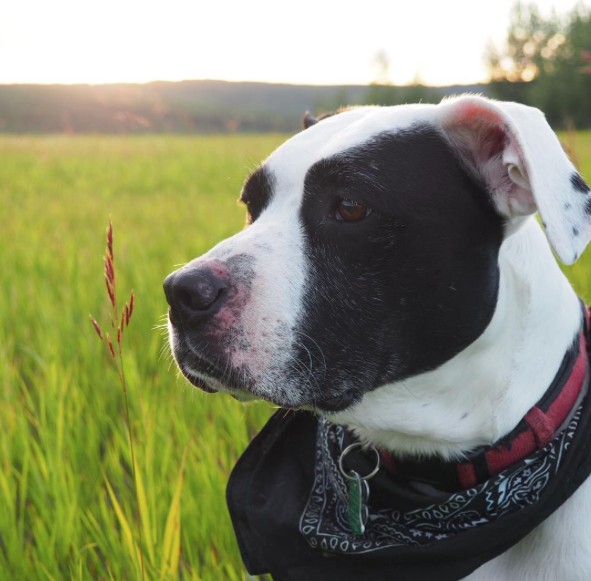
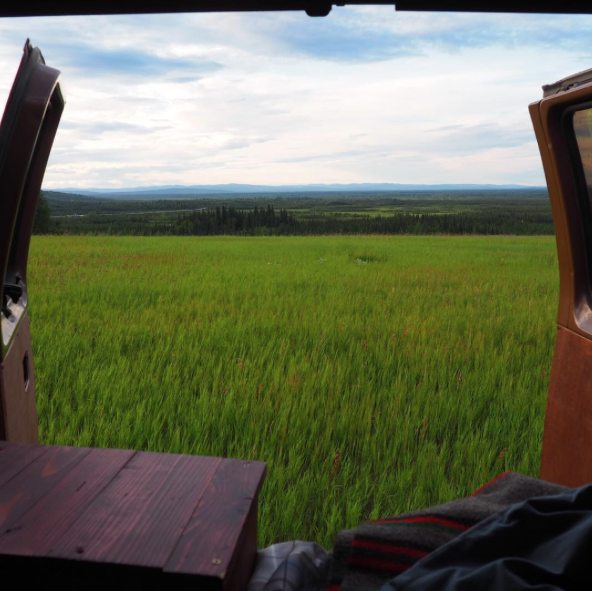
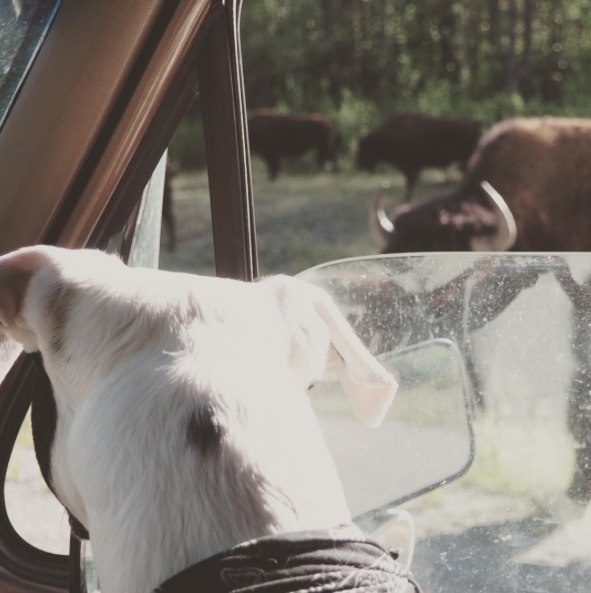
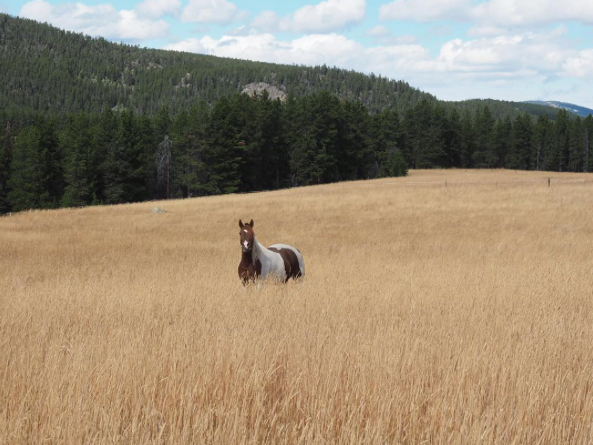
My move out date quickly arrived and I said goodbye to my cabin. I have a dog named Opal and the two of us moved into my van. She and I spent a week and a half easing our way into van life by living in the van on my boss’ property, nearly 700 acres of farmland located in the hills of Fairbanks. I didn’t have any neighbors other than sandhill cranes and the occasional moose.


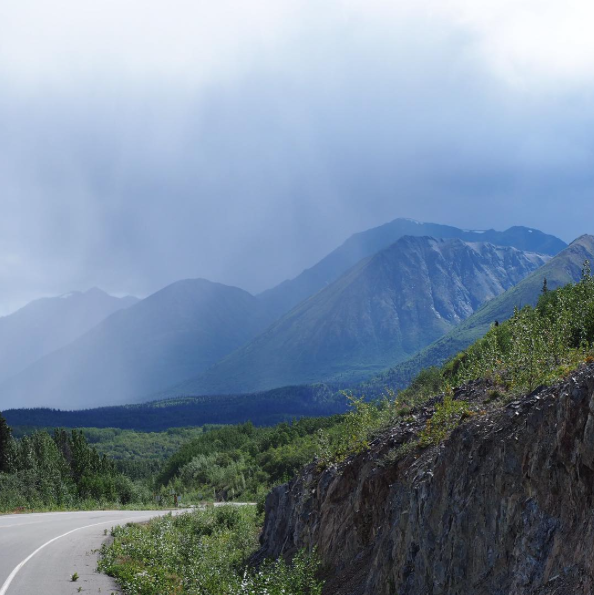
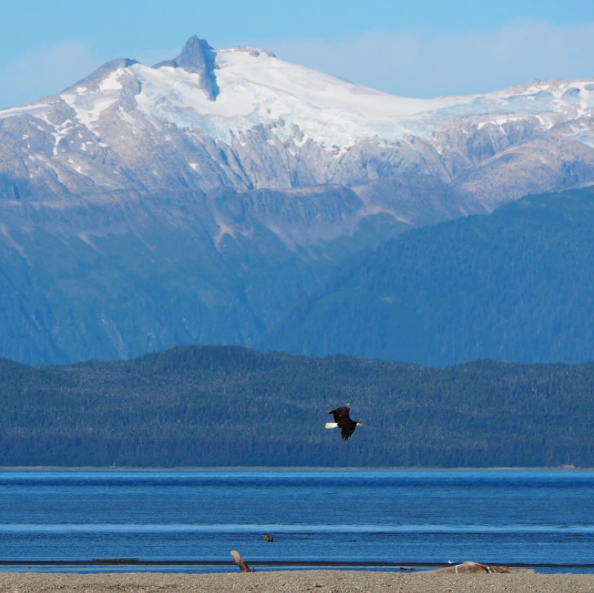
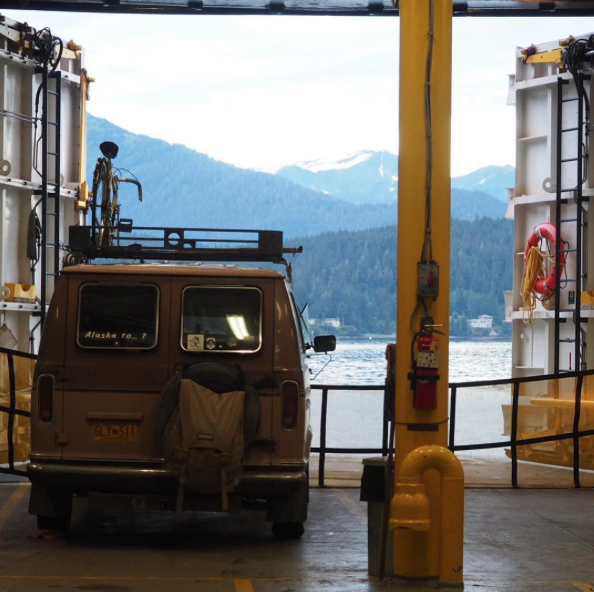
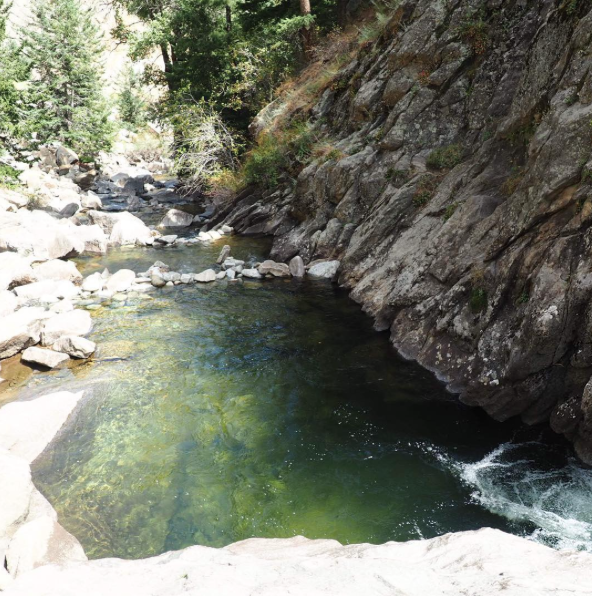
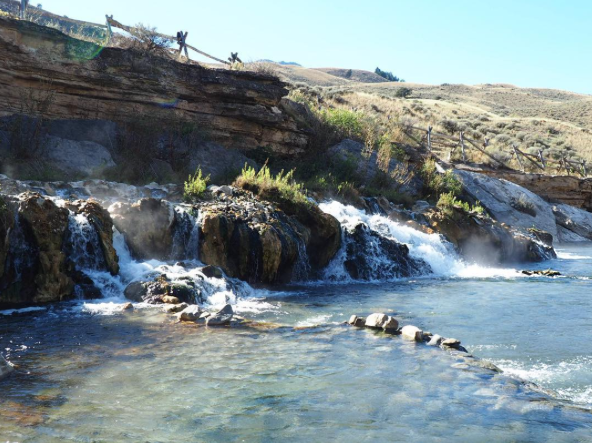
Opal and I left Fairbanks on July 25, 2016. We headed south from Fairbanks and explored southeastern Alaska, including Haines, Juneau, and Skagway. From Alaska we drove to the Lower 48. We spent the fall exploring Canada, Colorado, Wyoming, and Montana.


Why I Sold My Van and Bought a Sunrader Instead
My road trip wasn’t without incident. My van broke down along the way. In fact, it broke down a lot. I had to take the van to a mechanic in nearly every town I stopped.
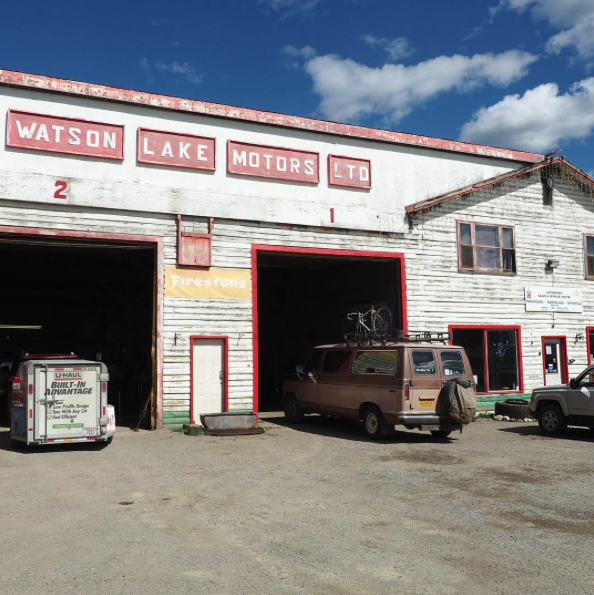
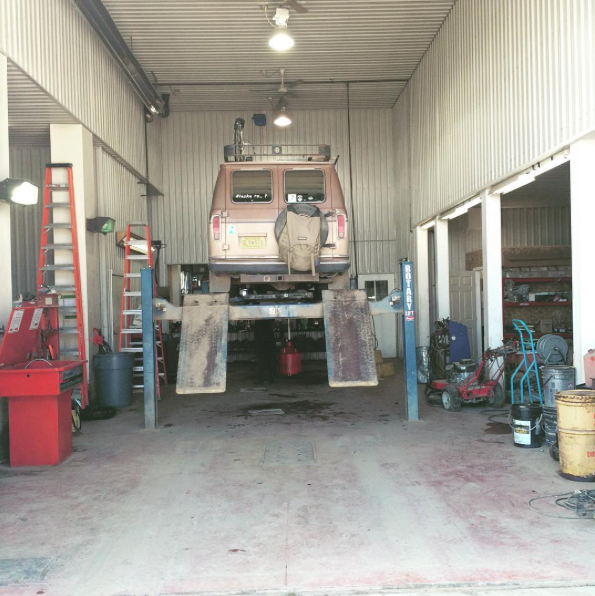
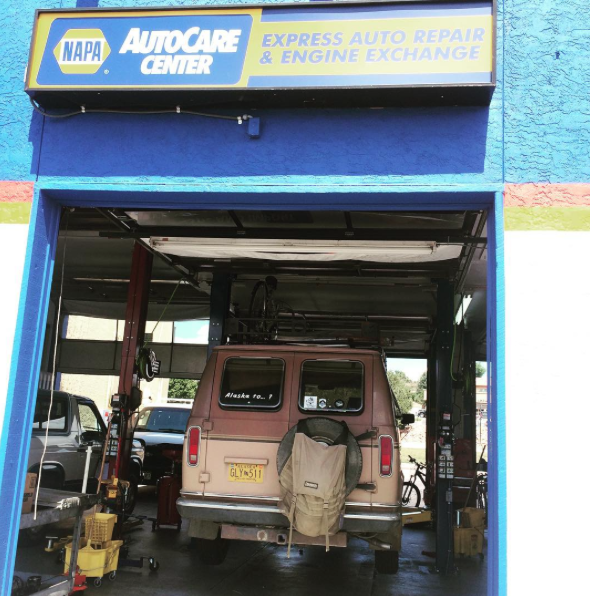
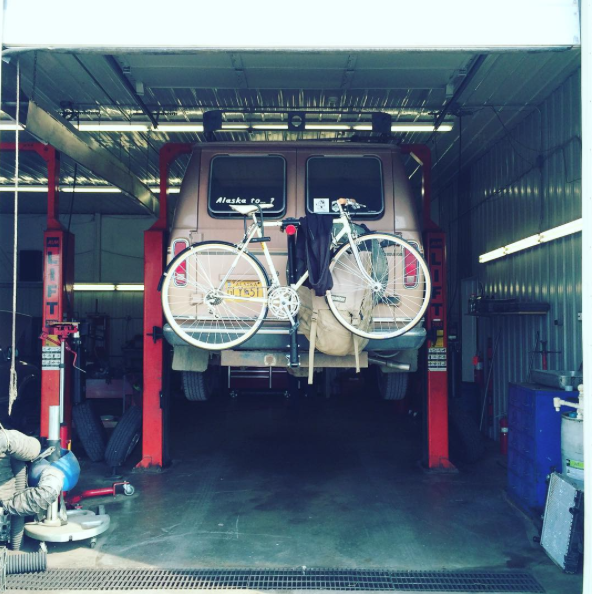
It’s stressful when your vehicle is in the shop for repairs. It’s exponentially more stressful when that vehicle also serves as your home. There were multiple occasions when I had to resort to pet friendly hotels for several days while my vehicle was being serviced.
Repairs added up quickly. In less than four months of owning the van I had invested nearly $4,000 into vehicle repairs. The problem was, once I would repair one thing something different would break and need repaired.
I knew I couldn’t keep sinking money into the van. If I continued at my current rate I would blow through my budget and not achieve my goal of paying down my student loans. I also knew I wasn’t ready to end my mobile life. I set my intentions to buying a vehicle better suited for my lifestyle.
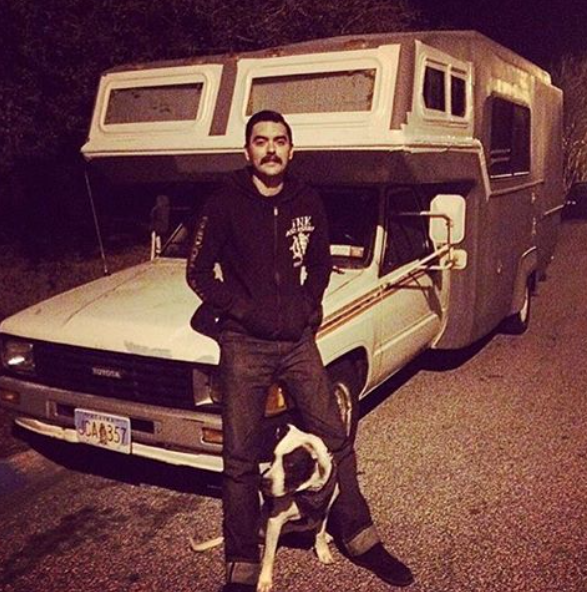
While in Montana I met a man from Texas that was traveling in a 80’s model Toyota Sunrader. Toyota started manufacturing campers in the early 1970s and continued manufacturing them into the early 1990s. Through the years Toyota has offered consumers nearly 30 models of campers, ranging from 10’ to 23’ in length. All campers are placed on the chassis of four and six cylinder trucks. The four cylinder campers are highly reviewed because of their fuel efficiency and the reliability of Toyota’s 22R engine.
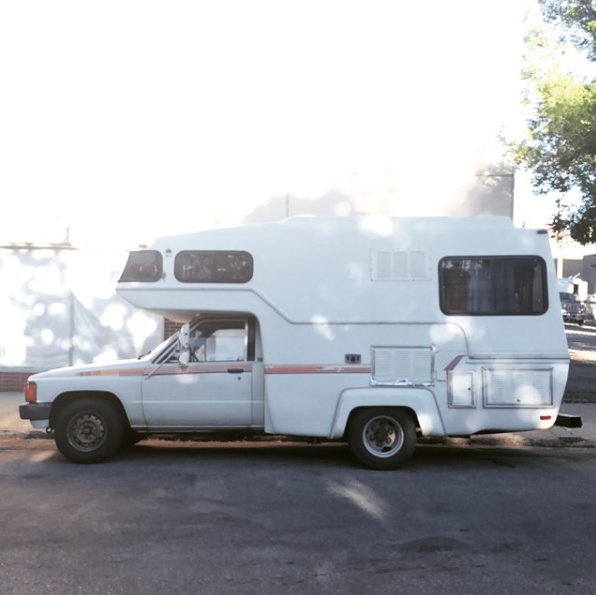
Sunraders are one of the more rare models of Toyota campers. Unlike other campers, whose shells are constructed from metal, Sunraders are constructed with a fiberglass shell. Fiberglass is ideal because it is lightweight and it does not rot or rust. The limited supply and high demand for Sundarders tends to lead to a higher asking price when they are listed for sale. The 18’ models can demand a price up to $12,000 depending on their mileage and condition, especially if it is an extremely rare 4×4 model.
I set out to find a Sunrader. I searched all of Craigslist and narrowed my options to two Sunraders, one located in Arizona and another located in South Carolina. Both sellers had a 21’ model available for sale and both were asking $5,000.
I asked each seller if they were willing to have the vehicle pre-inspected. The seller in Arizona declined while the seller in South Carolina accepted. He took the vehicle to be inspected and provided me with the mechanic’s report via email. The report showed that the vehicle needed new brakes, but everything else passed inspection. The seller and I negotiated on a price and finally agreed upon $2,700. I left Montana the next day and made my way south east to South Carolina.
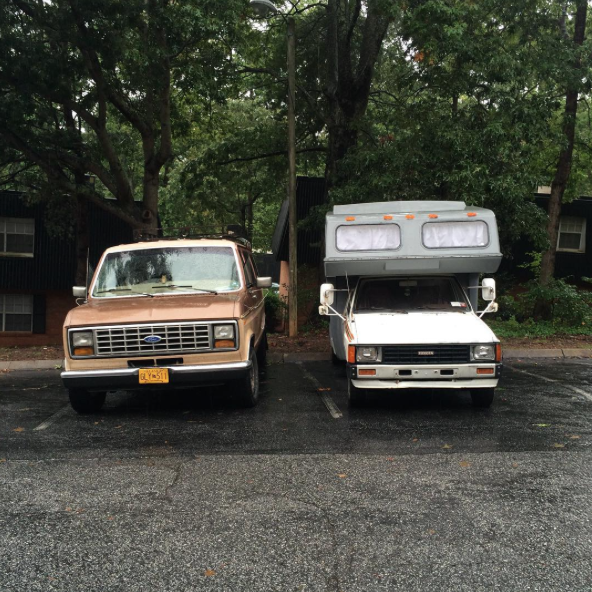
I arrived at the seller’s apartment in the middle of the night. The seller was working third shift but told me I could park my van in his apartment’s parking lot and sleep there without problem. I was excited to tour my new home in the morning.
I didn’t intend to be in South Carolina long. A nasty tropical storm was scheduled to hit the eastern coast that week. Weather forecasts showed that South Carolina would receive the brunt of the storm.
The seller and I went to the DMV the following morning to transfer the vehicle’s title. I also applied for temporary tags while at the DMV, which I used until I received my tags from Alaska. I returned to the Sunrader after we finished at the DMV. I cleaned out the van and loaded up the Sunrader.
I didn’t want to waste time trying to sell the van in South Carolina. I didn’t know what it was worth but I knew I had invested far more money into the van than I would get if sold. I called around to local homeless shelters and inquired if any of them would accept a vehicle donation. United Housing Connections was the first to respond to my inquiry and arranged to pick the vehicle up by 5:00 PM.
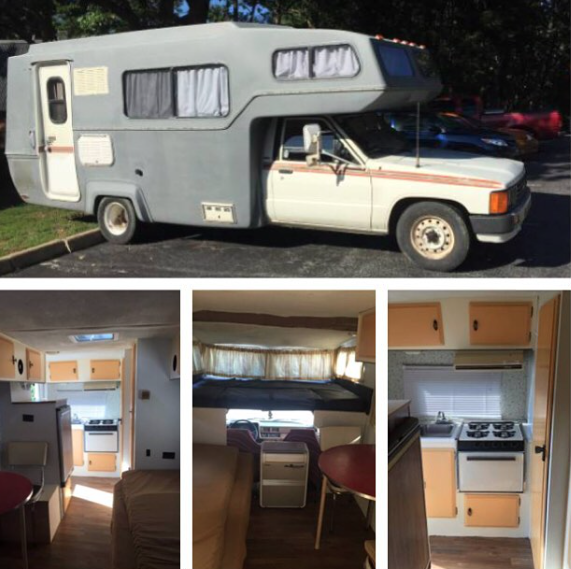
The Renovation
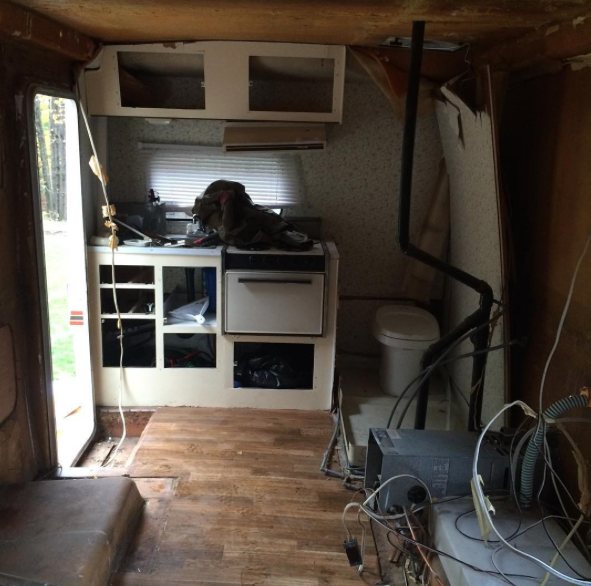
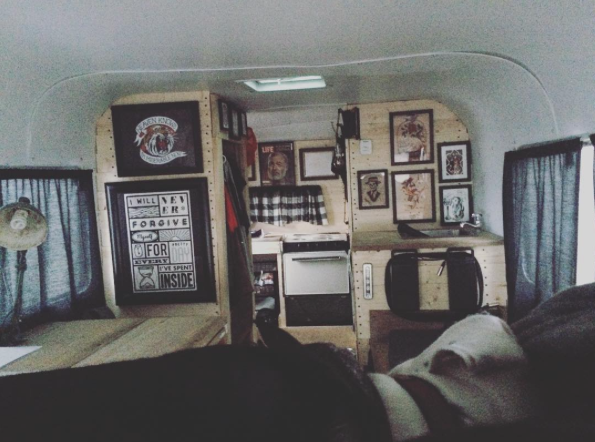
The Sunrader was in livable condition when I bought it. However, if I was going to be living in it I wanted the interior to reflect my personal taste. I drove the Sunrader north to Pennsylvania, where I’m originally from, to completely renovate the interior.
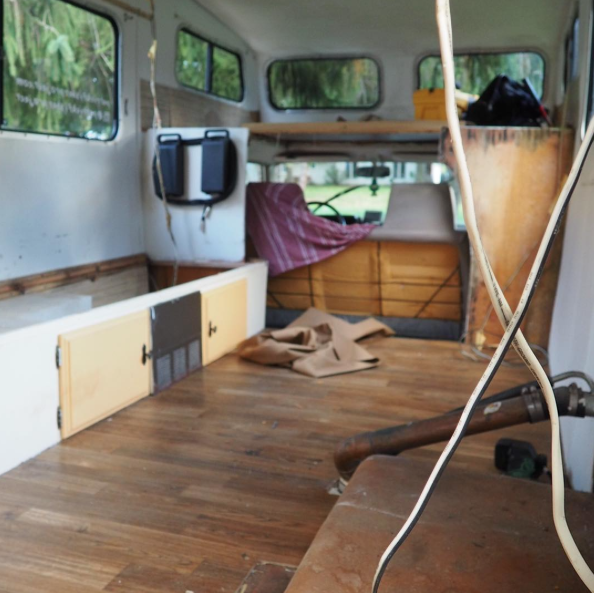
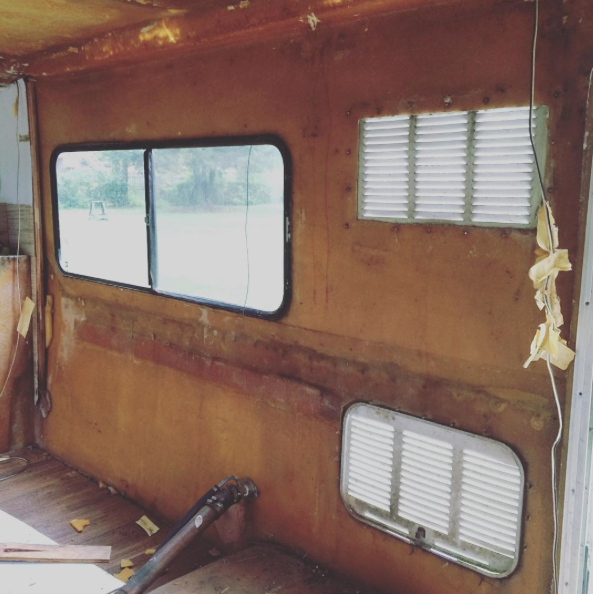
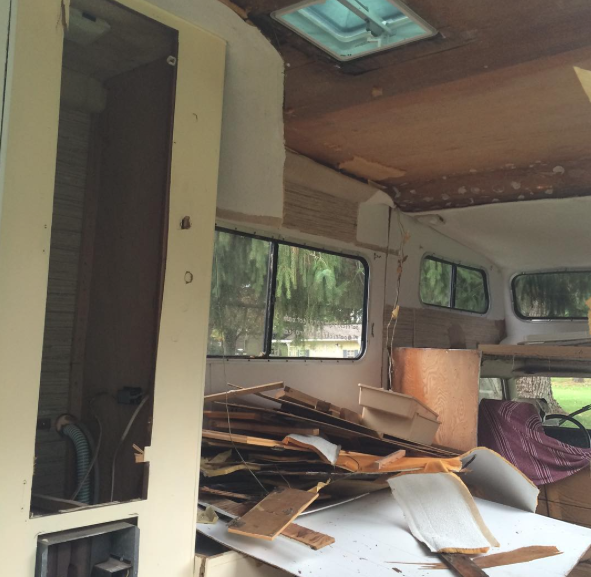
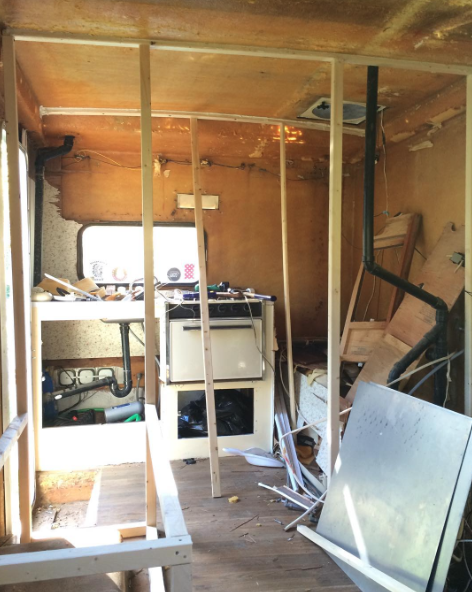
My grandfather retired from Pittsburgh Plate Glass (PPG). He is one of the most handy persons I know and offered to allow me to use his garage and tools to conduct my renovations. The first step in the renovation process was to completely gut the interior to the fiberglass shell.
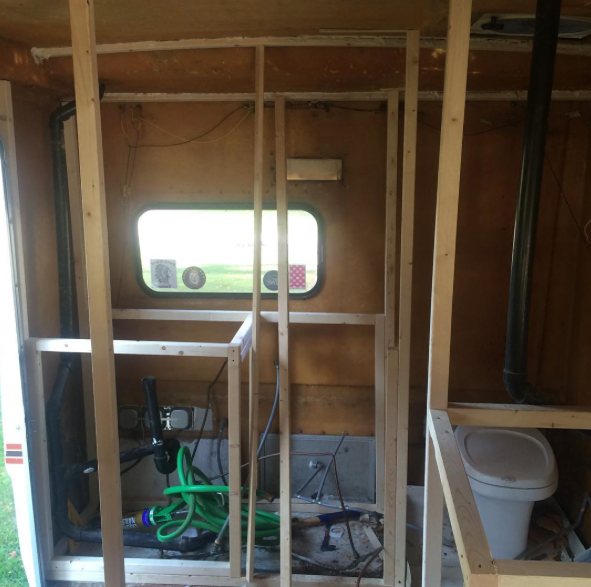
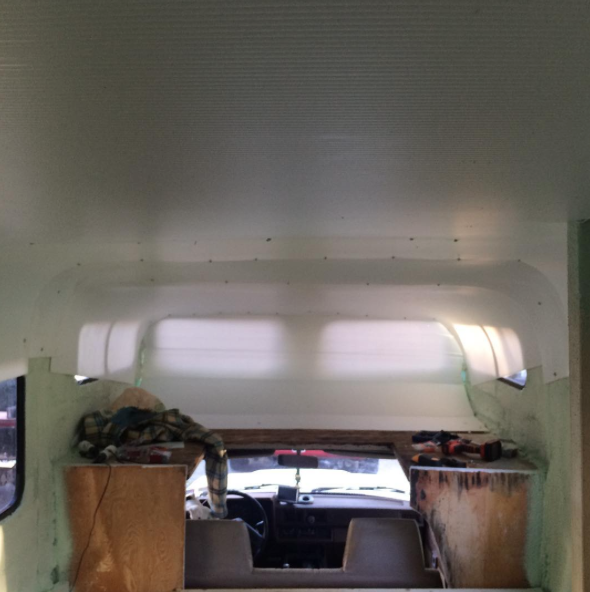
The next step in the renovation process was to install supports along the walls and ceiling. I used 1x2s as supports and secured them to the fiberglass shell using Liquid Nails. My plan was to insulate and then fasten corrugated plastic to the supports.
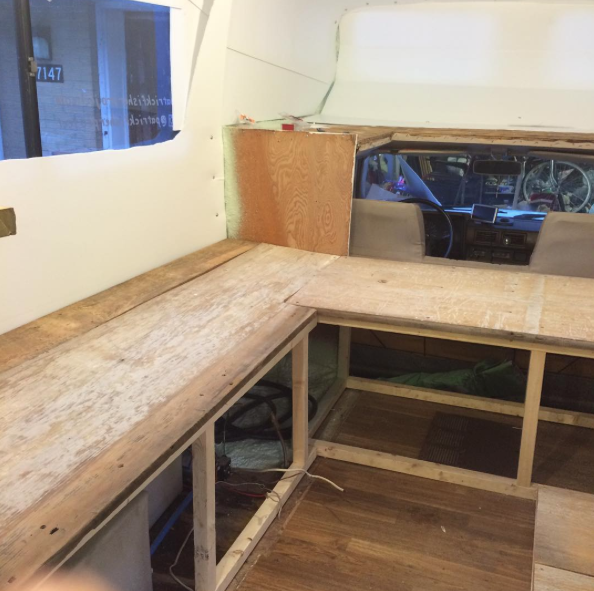
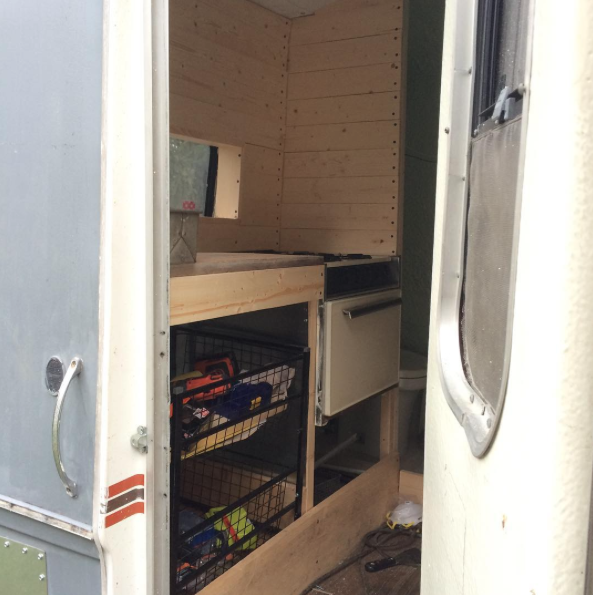
I used 2x2s when framing. The Sunrader previously utilized overhead storage. I wanted all storage to be at floor level because overhead storage in a moving vehicle didn’t make sense to me. I built a wrap around bench, which would house storage below.

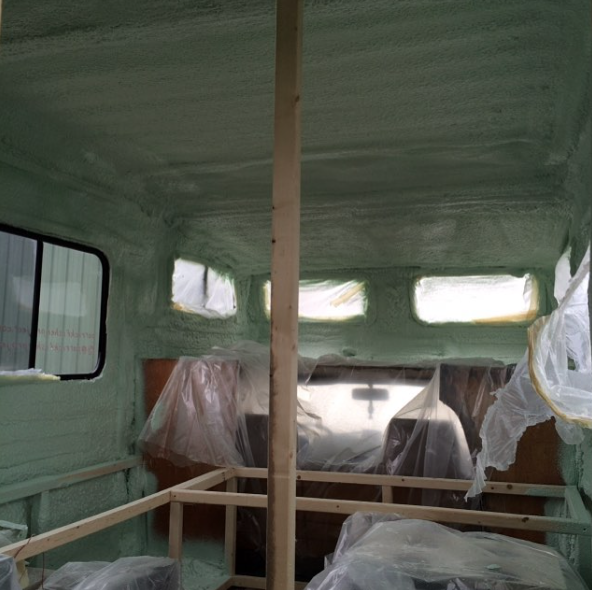
I used pink foam board when insulating the van. I went above and beyond when it came to insulating the Sunrader. I hired a contractor to professionally spray foam the interior. The sales person quoted me $475 and said they could spray the insulation at a depth of ¾”, which is the depth of a 1×2. This would be important so I could find the supports when installing the corrugated plastic.
On the day of service the spray technicians informed me that the sales person was incorrect regarding foam depths. They said the shallowest they could spray was approximately 1.75”. This would lead to complications when fastening the plastic sheets to the ceiling and walls because it would be difficult to locate the wood supports.
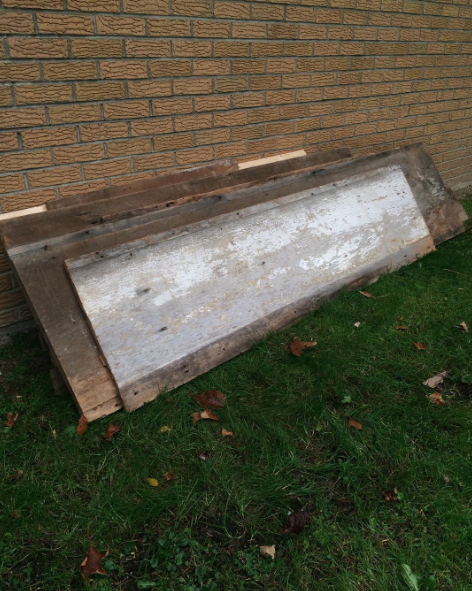
I like using reclaimed materials and recycling things and my friend Eric had a bunch of old barn wood leftover from a past project. He sold all the wood to me for $25. Buying the wood from Eric saved me a lot because typically barn wood sells anywhere from $2 to $10 per board foot.
The barn wood would be utilized as tops for benches, counters, and a table. I sanded the wood using a belt sander. Then, I needed to smooth the surfaces to avoid splinters but I didn’t want to sand the wood to the point that it lost its character and charm.
Corrugated plastic is available online through Home Depot. However, it has a lead-time of nearly two weeks because it’s a non-stocked item. This wasn’t going to work with my project timeline so I needed to find an alternative supplier.
I found a distributor in Erie that sells 4’x8’ sheets of corrugated plastic. Typically the distributor only sells to wholesale accounts but the salesperson I dealt with was kind enough to set me up as a buyer. I purchased 15 sheets at a price of approximately $13 per sheet.
I opted for corrugated plastic because it is lightweight and durable. It’s also water resistant. I used a Dremel rotary tool to cut the corrugated plastic to size. A benefit of the plastic is that it is pliable and able to be curved or bent as necessary.
As I expected, it was difficult to find the wood supports when installing the plastic sheets. I used a stud finder to assist with locating the supports, which were embedded in spray foam. There were multiple instances where I thought I had located a stud but found myself drilling into foam.
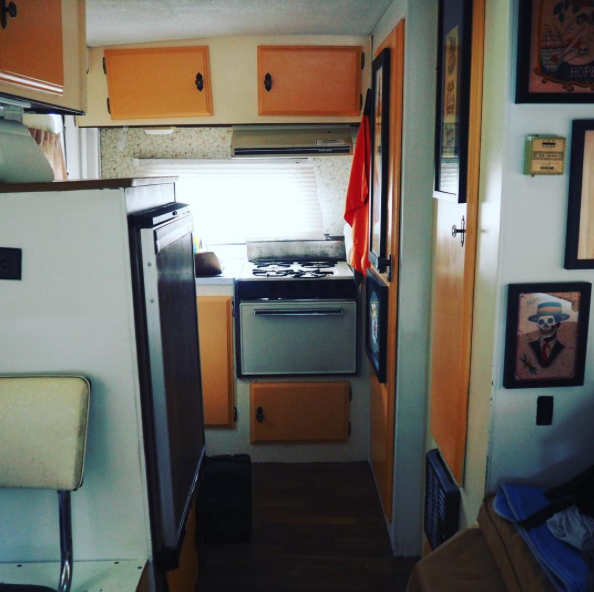
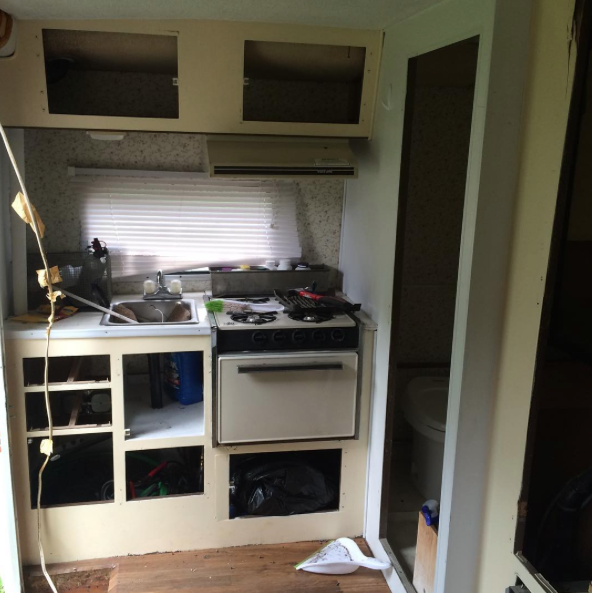
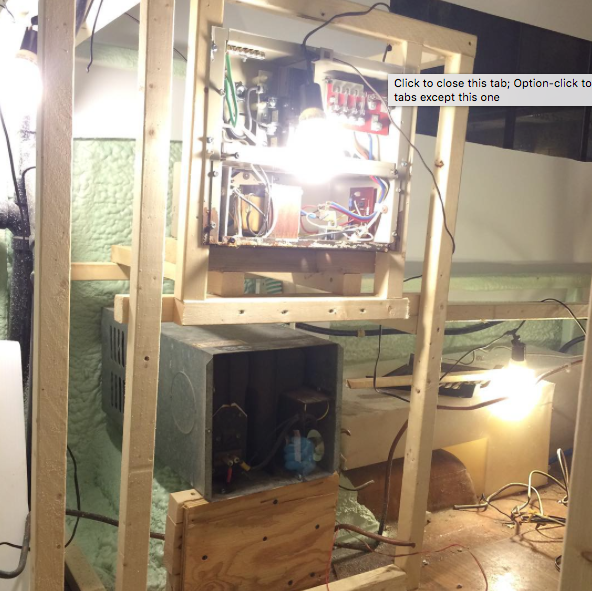
I utilized the original appliances in the Sunrader to keep my renovation costs low. All the appliances operated properly except the furnace, which required a new circuit board and wiring harness. I was able to purchase both items through Amazon for a combined total of less than $150.
The furnace and stove operate using propane. The refrigerator also operated on propane but I removed the refrigerator because of how much room it took up. A cooler and ice will be utilized in place of a refrigerator. I ran all new copper gas lines to the furnace and stove. The copper lines and all the necessary couplings cost me less than $50.
Gas and electric were two things I found very intimidating before I embarked on the renovation project. Thankfully I had my grandfather’s help when tackling this portion of the project. His assistance helped move the project along and he was gracious enough with his time to teach me the basics about wiring an electrical box.
Next I installed the tops to the counters and benches. I used wood shims to level the surfaces. I then fastened everything in place. I highly recommend using self-driving screws. If you aren’t using self-driving screws then you should pre-drill your holes and I recommend using a countersinking drill bit.

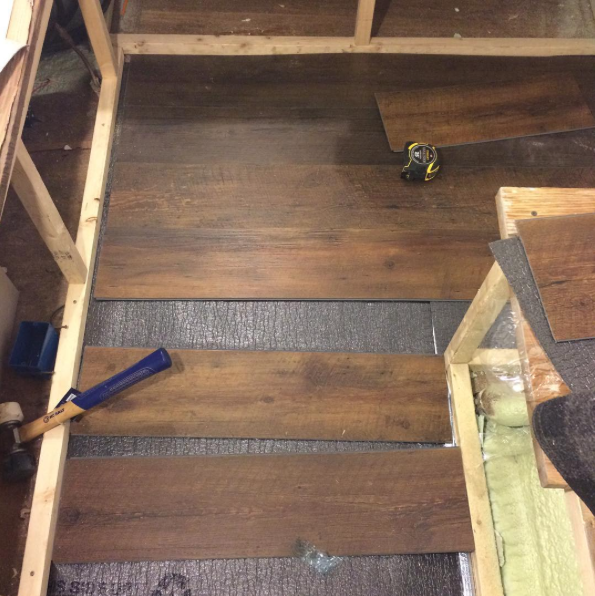
The person from whom I bought the Sunrader had previously installed a low-grade roll out vinyl flooring. I covered over the vinyl using a durable snap-together laminate flooring. I received the flooring at no cost from my father, who had it left over from a project at his house.
It’s important to use an underlayment when installing wood and laminate flooring. I opted for a 3-in-1 underlayment. The underlayment enhances thermal and moisture properties, helps smooth subfloor imperfections, and dampens sound. I bought 100 square feet of underlayment for approximately $45. 100 square feet was more than I needed for the project but unfortunately the underlayment wasn’t available in smaller quantities.
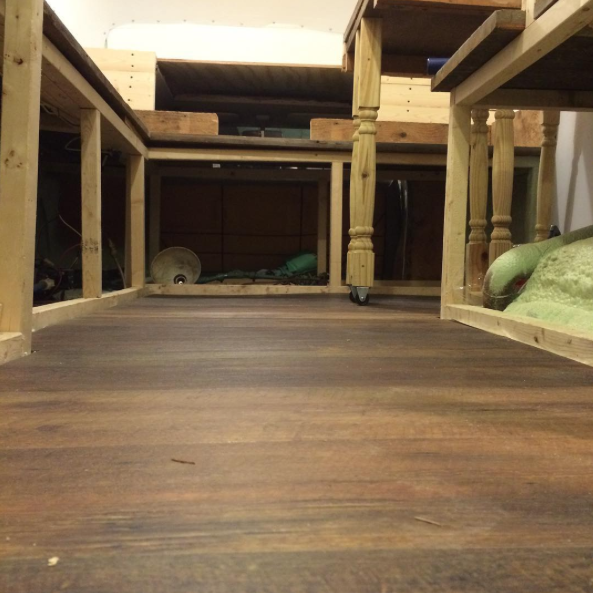
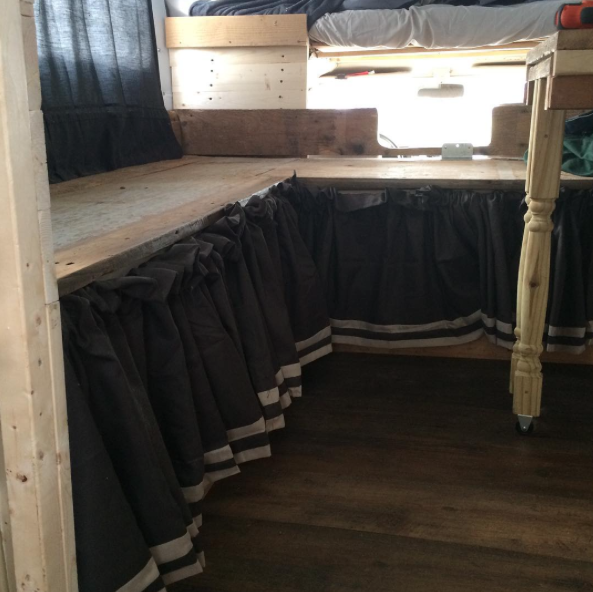
I constructed a table from the barn wood and used porch banisters for the table legs. Then, I built a sliding leaf into the table so that it can expand in. The two front legs are attached to casters to allow the leaf to slide in and out as necessary.

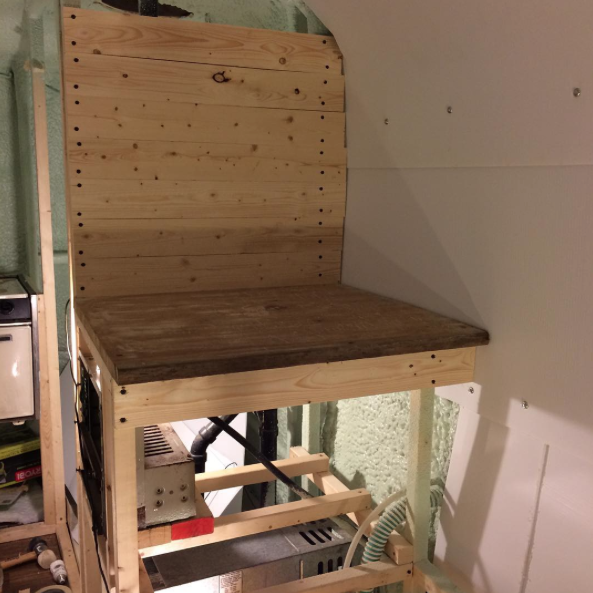
I used pine planks and created walls to divide the space inside the Sunrader. I purchased the planks in 8’ lengths and cut them to size. I tried to be mindful of how much weight I was adding to the Sunrader and how that would affect gas mileage and vehicle performance when going up hill.
Previously I mentioned the importance of pre-drilling and countersinking holes, this is especially true when using pine planks. I didn’t always take my own advice, however, and often sank my screws too deep, which caused the planks to crack. Thankfully I’m okay with imperfections.
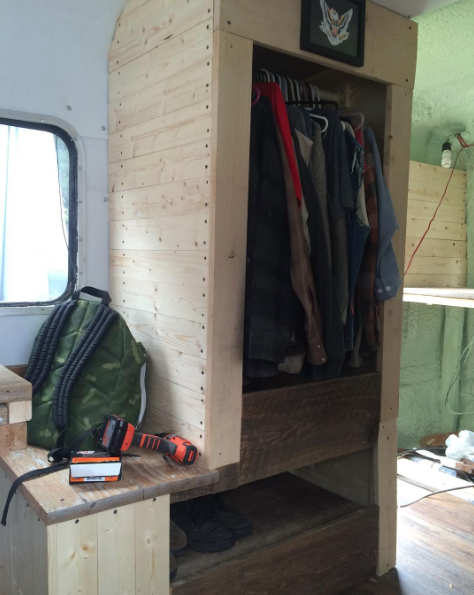
I used leftover barn wood to add character and a shelf to the closet. The shelf is used to store footwear. There is a small lip on the shelf to prevent things from sliding out while the vehicle is in motion.
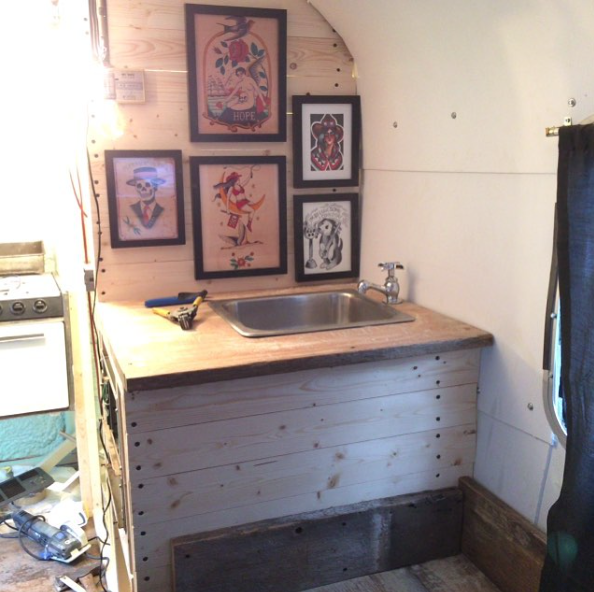
The sink was originally located by the stovetop. But I relocated the sink to create usable counter space beside the stovetop. Using a jigsaw I cut a hole in the wood counter for the sink to sit. Relocating the sink required removing the old plumbing and tying the sink into the shower’s existing drain. It was awkward running the plumbing in such a confined space but it didn’t prove to be that difficult.
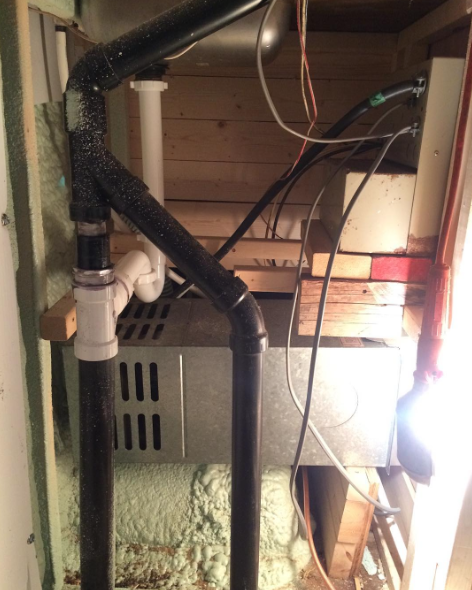
I used PEX tubing and SharkBite connectors when running water lines to the sink and toilet. Originally the Sunrader came with a shower. I chose to not install a shower during the renovation for two reasons.
First, the former owner removed the hot water heater and I’m not the biggest fan of cold showers. Second, the water tank is only 15 gallons. If I were to shower in the Sunrader I’d need to constantly fill the water tank.
Instead of showing in the Sunrader, I have a nation-wide gym membership to Planet Fitness and use the gym shower after my daily workouts. If you’re going to be living in a van, camper, or RV I highly suggest purchasing a $19.99/month gym membership.
There is storage below the wrap around benches. I originally planned to build cabinet doors for the front of the benches. but decided against this and instead utilized curtain valances as a lightweight alternative. I purchased four valances on Amazon from a clearance company for $0.99 per valance.
I found a wire rack in my grandparents’ house that they weren’t using. The rack consisted of three tiers of shelves. I removed one of the tiers and fastened the rack in place under the counter in the kitchenette. The rack is used to store kitchen items.
The Sunrader is an attention-grabbing vehicle. It is unlike most campers and RVs. Combine that with the fact that it has Alaska license plates and you can understand why folks are intrigued enough to stop and talk with me.

During a conversation it isn’t uncommon for me to be informed by someone that I’m living his or her dream. Regardless of the person, I always provide the same response when someone says this to me. This lifestyle is far more obtainable than you might think.
I’m not independently wealthy, far from it. As I previously mentioned, I’m deep in student debt. I live off an annual salary of $55,000. I purchased the Sunrader for $2,700.
During renovations I invested approximately $1,000 into vehicle maintenance. The renovation itself cost me less than $3,000. I’m an unconventional home owner for less than $6,700, which is why I say this is more obtainable than most people may think.
Renovating the Sunrader was extremely rewarding. It was a great opportunity to spend time with members of my family. Not only did I have the help of my grandfather, but also my nephew joined me in working on the Sunrader after school and during the weekends.
This project also forced me outside of my comfort zone. I took on tasks that were previously outside of my skill set. In doing so I discovered a passion for building projects. I started and completed something that I can be proud of.
I’d like to offer the following suggestions to anyone interested in living the mobile life:
- Select a dwelling that works best for your needs and intended use, whether that be a van, RV, or pull behind camper.
- Develop a budget and be mindful of your spending. I personally monitor my budget weekly and dedicate Fridays to reviewing my financials.
- Connect to your community. This includes both social media and message boards. I personally am a huge fan of the Toyota Motorhome discussion board. Members of the discussion board have been extremely helpful any time I have turned to them for insight.
- Maintain a PMA. Hiccups are bound to occur and setbacks are inevitable. You will break down and your patience will be tested. Maintaining a positive mental attitude goes a far way.
- Have fun and explore. Venture off major highways when applicable. Be willing to step outside of your comfort zone.
- Don’t be afraid to include others in your journey. I personally write daily and post it to my website. I also utilize Instagram. At the very least I know my family appreciates knowing I’m alive and not stranded somewhere on the side of the highway.
Side note: You’ll notice the white tape around the bunk windows. That’s because I had leaks around the window seals. I used ultra-bond roofing tape to cover the seals. I wish I had the hindsight to check for leaks when the Sunrader was a bare fiberglass shell. If I would have checked first, I could have resolved the leaks by properly resealing the windows.


Very cool story! I also read the book Walden on wheels, and truly loved it! In all honesty, I don’t think the lifestyle would be right for me, as I am married and with a small baby, love sewing (you need a loooot of space for it) have an etsy shop, want to own a piano desperately, and stay close to my siblings while they are all still toddlers so they have a chance to see me weekly, but as far as sleeping, storing personal belongings, working from the road, and utilizing showers at planet fitness goes, ect, I could absolutely get behind it!
As it is, I’m determined to plan a mini road trip for my husband and daughter and going in a circle around Indianapolis with our little Toyota sedan through multiple states over the course of at least 5 days, staying in our car and using truck stop showers for the most part. While living on the road may not be for me, I’m all for being brave enough to take a trip that’s not perfectly charted, stop where I feel like, and having a bit of an adventure.
Love your remodeling story! It’s very inspirational.
Ah super cool Heidi. Totally agree it’s not for everyone. NOTHING is for everyone lol. But speaking of Etsy shop, I actually just interviewed a couple who travel/live in their RV full-time who run a successful Etsy shop while on the road. Super inspiring story. Here is a link –> http://heathpadgett.com/episode5.
Traveling give you adventure if your roof is safe. Otherwise you stuck. Roofing care takes time and expenditure but exciting too. To seal leaks, Most professional manner is Liquid Roof RV provide you protection from leaks damages and installed lifestyles of your roof.
Hey there! We actually have a 1986 toyota sunrader that is the exact set up of yours! What year is yours? I’ve seen a lot of sunraders but none with our floorplan! Do you guys have any of the stuff you tore out from when you bought it?